Tag: Swan

How To Shoot and Edit Low-Key Wildlife Photos

This is the second of four posts about shooting and editing wildlife photos for different creative results on safari. We’ll look at high-key, low-key, black-and-white, backlit & silhouette. Each style offers a unique way to see and a different set of choices, both when you’re out in the field and when you’re editing. While I’m focusing on a South African safari, these ideas work anywhere you’re photographing wild animals.

I use Canon equipment for all my photos, but I’ve tried to avoid using brand-specific terms wherever possible. My main post-processing tools are Lightroom Classic and Photoshop, and my guide starts from there, but I kept the details general, and they would apply to most post-processing software.

Today, we’ll continue with the low-key style.

A low-key photo of a Chacma baboon sits bathed in the warm, golden light of sunset, its gaze directed thoughtfully into the distance.The image captures a solitary Chacma baboon from the chest up, viewed from its left side. The baboon is seated, with its face turned to the right, looking into the golden haze of the setting sun. Its fur appears thick and coarse, with shades of gray and brown, and is dramatically illuminated by the backlighting, creating a halo effect around its head and shoulders. The sunlight highlights the texture of its fur, particularly on its back and the right side of its face. The baboon's eyes are a striking amber color, and they seem to catch the light. Its muzzle is dark, and the contours of its face are softened by the warm light and shadow. Only a portion of its body is visible, suggesting it is sitting on a dark, rocky or earthy surface. To the left of the baboon, there is dense foliage, appearing as dark silhouettes against the glowing background. A branch with some blurred golden or orange leaves hangs from the upper left corner, adding to the atmospheric quality. The background is a soft, diffused haze of warm colors – oranges, yellows, and browns – with subtle hints of light and shadow. The overall atmosphere is serene and contemplative, with a touch of wildness.
Chacma Baboon, South Africa

My best low-key photo almost didn’t happen. We had been watching a male baboon for nearly half an hour. The light was nice, our spot was good, and the baboon was relaxed, in the way that animals are when they have absolutely no interest in you. Then the light shifted. The soft golden-hour glow faded as clouds moved in from the west. The guide turned on the engine. 

I asked him to wait.

The sun slipped below the clouds and sent a beam of low light across the baboon’s face. Everything behind him, the trees, the bushes, the late afternoon shadows, turned almost black. Only the baboon was lit. I kept taking photos until the light disappeared. That evening, only the shots from those last ten minutes were worth keeping.

That’s what low-key photography is about. It’s not just darkness for its own sake, but using darkness as a tool to highlight what matters and let the rest fade away.

This image is a striking, low-key portrait of a young lioness, focusing on her intense gaze and facial features against a deep black background.
Side light, deep shadow, and a lioness who wasn’t paying us any attention. That’s the low-key formula on safari: find the tonal separation already sitting in the scene, spot-meter on the lit side of the face, and let the black do the rest of the work.

What Low-Key Actually Is

Low-key is the opposite of high-key. It relies on dark tones and deep shadows. The subject stands out from almost black surroundings, shaped by careful lighting. High-key images are bright and airy, while low-key images limit the light so only what you want is visible.

But in wildlife photography, you can’t control everything. You can’t move a lion or change the direction of the light. What you can do is notice when the right conditions appear and be ready to capture them.

The key is tonal separation. The subject needs to be noticeably brighter than the background. If both are lit the same way, the image looks flat, not low-key. The drama in low-key photos comes from the contrast between the lit subject and the dark surroundings.


The Conditions to Look For 

On safari, low-key lighting often happens naturally. To spot good opportunities, watch for these situations:

Golden hour with a dark background. The low sun, just after sunrise or before sunset, gives strong, directional light. If an animal is lit from the front or at an angle and the background is in shade, like a dark tree line, thick bush, or riverbank shadow, the scene already has the tonal separation you need. You’re not making the image, just noticing it.

Dappled light under trees. When an animal sits under a tree and light filters through the branches, you get a natural, low-key effect. The bright spots light up the animal in places, while the shadows around it do the rest.

Storm light. A dark, cloudy sky can create amazing low-key conditions. When a gap in the clouds lets light hit your subject, the rest of the scene stays in deep shadow. These moments are short and unpredictable, which makes them special. The drama is already there; you just need to be ready.

All these situations have one thing in common: the light seems purposeful. It doesn’t light up everything evenly, but instead highlights only certain parts.

In the Field

The image captures the striking close-up of a black swan (Cygnus atratus) against a stark, dark background.
Black Swan, South Australia

For low-key shots, I use Manual mode. The strong contrast in these scenes makes auto metering unreliable. The camera sees the dark background and tries to brighten everything, which you don’t want. Manual mode gives you full control.

Spot-meter on the lit area of the subject: the highlighted shoulder, the lit side of the face. Using spot metering measures exposure from a single point in the frame, which helps ensure the animal itself is correctly exposed, even if the rest of the scene falls into shadow. Don’t worry about the background; let it go dark.

Turn off Auto Lighting Optimizer or any similar shadow-brightening feature on your camera. If it’s on, it will try to brighten shadows and ruin the low-key effect before you even start editing. Also, turn off Highlight Tone Priority.

Use negative Exposure compensation. I shoot manual, but my Canon R5M2 lets me dial in exposure compensation in Flexible Priority (Fv) mode. Lowering it by one or two stops works well. This makes the image darker, so the subject’s lit areas look right while the background gets darker.

When an animal starts moving quickly, I switch to a higher shutter speed, usually 1/1.000 second or faster, to freeze motion and avoid blur. I also raise the ISO as needed to keep the image exposed properly without letting the shadows get murky.

Continuous autofocus (AI Servo/AF-C) helps keep a moving subject sharp, while burst mode (I use Canon’s Drive Mode High-speed continuous shooting +) increases the chance of capturing the perfect moment when the light and pose come together.

If the animal moves into deeper shade or the light changes suddenly, be ready to adjust your exposure compensation or spot-meter on the brightest part of the subject again. Reacting to movement is as much about anticipation as it is about camera settings; follow the animal with your lens and keep your finger half-pressed on the shutter, so you’re ready as soon as light hits.

For the Histogram, think the opposite of high-key. Most of the tones should be on the left, with many dark areas. There should be a smaller peak on the right for the lit parts of your subject. Make sure this peak doesn’t touch the edge of the histogram; if it does, you’ll lose detail in the highlights.

Animal Detection autofocus can help, but it works best in good light rather than in deep shadows. If your camera struggles to focus, switch to Spot autofocus and place it on the lit part of the animal. In very low light, the bright edge usually gives the best contrast for focusing.

Always shoot in RAW for low-key photos. This is essential. You need the flexibility to manage shadows, recover highlights, and adjust tones, which you just can’t do well with JPEGs. For camera settings, I typically start with an aperture around f/5.6 to f/6.3 to keep a nice balance between depth of field and subject sharpness. ISO often sits between 800 and 3.200, depending on how dark the scene is and how much light I have on my subject. These settings give me a good base for most low-key wildlife shots, but I always adjust as needed based on the light and the animal’s behavior.


Post-Processing

Editing low-key images is the opposite of editing high-key ones, but it needs more care. You’re not just flipping the high-key process. Instead, you shape the darkness, making it deeper in some spots, keeping texture in others, and managing how light fades into shadow. This makes the image dramatic, not just dark.

I do most of my initial editing in Adobe Lightroom Classic, so all of the steps here refer to Lightroom’s panels and tools. 

Start in the Basic panel. Lower the Shadows slider by forty to eighty, depending on your image. Lower the Blacks by the same amount. Raise Contrast by twenty to forty points. Add a bit of Clarity. Low-key photos look better with more mid-tone contrast, which makes the subject stand out. Use the Tone Curve too: add a point in the shadow area and pull it down a little. This deepens the shadows without changing the highlights, giving your image its signature depth.

Most of the editing happens during masking. In Lightroom, click the masking tool (the circle-and-dash icon), then choose ‘Select Subject.’ Lightroom will automatically highlight the main subject, usually the animal, with a red overlay. With the subject selected, raise the shadows a bit, just enough to keep some texture where light meets dark. Next, click ‘Invert’ in the mask panel; now the mask affects everything except the animal. Adjust the background by lowering the Exposure and setting Blacks to minus 60 or lower. The background should be almost pure black. If you see any mid-tone gray, keep adjusting until it’s gone.

A dramatic, close-up portrait of a rooster is presented against a stark black background.
Rooster (Gallus gallus domesticus)

Pay close attention: what separates a low-key photo from a plain dark one is intentional lighting. The lit parts of your subject should look truly illuminated, not just less dark than the rest.

For detailed edge work, after darkening, use a Luminance Range mask on the brightest areas. Raise the Whites and Highlights a bit. This keeps the feeling that the light is intentional.

A rim-lit mane against a dark background, use Photoshop’s Dodge and Burn tools on a 50% grey Overlay layer. The Burn tool deepens shadow edges, while the Dodge tool brightens highlights. Use low opacity and build up the effect slowly. This looks much more natural than making big changes all at once.


Low-key photography asks you to do something that feels a bit uncomfortable: trust the darkness. When you look at your photos on a small screen in the field, you might want to increase the exposure. For low-key shots, that’s the wrong move. The darkness isn’t a problem; it’s what makes the image.

That difference, seeing darkness as intention, not a problem, is what separates an underexposed photo from a true low-key shot. The baboon in those last ten minutes wasn’t badly lit. He was lit perfectly for the image. 


Related Posts


Love my work? Support my journey by buying me a coffee or sharing it on your preferred social network. And don’t forget to swing by my online shop to check out my latest prints and gifts. Thank you 🙏 !

Follow me on Instagram | Facebook | Threads | LinkedIn | Tumblr | X | Buy Me A Coffee 


Dance With The Fear

Black swan, Kangaroo Island, South Australia

I remember a morning on Kangaroo Island — overcast, the light flat and uncooperative, my camera next to me, and nothing moving in the scrub. I had driven out before dawn specifically for this, and now I stood there doing nothing. Not because there was nothing to photograph. Because I could not decide where to begin.

That paralysis is not about conditions or equipment. It is about the blank canvas problem. Every creative act starts in the same place: an empty frame, a cursor blinking on a white page, a silence that asks you to be the one to break it. And something in us resists. We inflate what we are about to make until it carries more weight than any single photograph or paragraph or brushstroke can bear, and then we cannot move under that weight.

The way out is smaller than you think.

Tell yourself you are not making anything yet. You are just sketching — warming up, loosening the joints, seeing what is there. In the field this means making the first technically imperfect frame anyway: wrong exposure, wrong angle, too much foreground. It does not matter. You have pressed the shutter. The paralysis is broken and you are working. In writing it means a sentence, even a bad one, placed on the page. In any creative practice it means permission to produce something provisional, something that does not count yet. Play is not the opposite of serious work; it is usually how serious work begins.

What happens next is worth paying attention to. Once you have something — even a rough thing — the terms of the conversation change. You are no longer trying to conjure from nothing; you are responding to what is already there. You adjust, you refine, you follow the thread. The fear that was blocking you does not disappear, but it shifts from the front of your attention to the edge of it. The work absorbs you and carries you forward. This is not a trick or a hack. It is simply how the creative process functions when you let it.

There is a temptation, particularly if you are serious about your craft, to want to bypass the uncomfortable part — the uncertainty, the not-knowing, the exposure of putting something unfinished into the world even provisionally. But that discomfort is load-bearing. The friction between what you can see in your mind and what you are able to execute right now is precisely the tension that produces growth. Good work — the kind that has texture and honesty to it — tends to come from staying inside that tension rather than from resolving it too quickly.

So dance with it. Not because the fear is pleasant, but because it is telling you that what you are attempting matters to you. That is useful information. Use it.

Show up. Make the imperfect first frame. The rest follows.


Related Posts


Love my work? Support my journey by buying me a coffee or sharing it on your preferred social network. And don’t forget to swing by my online shop to check out my latest prints and gifts. Thank you 🙏 !

Follow me on Instagram | Facebook | Threads | LinkedIn | Tumblr | X | Buy Me A Coffee 


Favorite Photos: December 2025

  1. My 2022 Favorite Photos
  2. Favorite Photos: January 2023
  3. Favorite Photos: February 2023
  4. Favorite Photos: March 2023
  5. Favorite Photos: April 2023
  6. Favorite Photos: May 2023
  7. Favorite Photos: June 2023
  8. Favorite Photos: July 2023
  9. Favorite Photos: August 2023
  10. Paris Is Always A Good Idea
  11. Favorite Photos: October 2023
  12. Favorite Photos: November 2023
  13. Favorite Photos: December 2023
  14. My 2023 Favorite Photos
  15. Favorite Photos: January 2024
  16. Favorite Photos: February 2024
  17. Favorite Photos: March 2024
  18. Favorite Photos: April 2024
  19. Favorite Photos: May 2024
  20. Favorite Photos: June 2024
  21. Favorite Photos: July 2024
  22. Favorite Photos: August 2024
  23. Favorite Photos: September 2024
  24. Favorite Photos: October 2024
  25. Favorite Photos: November 2024
  26. My 2024 Favorite Photos
  27. Favorite Photos: December 2024
  28. Favorite Photos: January 2025
  29. Favorite Photos: February 2025
  30. Favorite Photos: March 2025
  31. Favorite Photos: April 2025
  32. Favorite Photos: May 2025
  33. Favorite Photos: June 2025
  34. Favorite Photos: July 2025
  35. Favorite Photos: August 2025
  36. Favorite Photos: September 2025
  37. Favorite Photos: October 2025
  38. Favorite Photos: November 2025
  39. My 2025 Favorite Photos
  40. Favorite Photos: December 2025
  41. Favorite Photos: January 2026
  42. Favorite Photos: February 2026
  43. Favorite Photos: March 2026
  44. Favorite Photos: April 2026
  45. Favorite Photos: May 2026
  46. Favorite Photos: June 2026
Black Swan

A quick edit of a black swan photo taken on Kangaroo Island (South Australia) where we spent a few weeks this December, part of our recent Australia trip. More to come, once I’ve been through all photos 😅.

In the meantime, I leave you with some interesting facts about them.


Interesting Facts About Black Swans

  • Black swans (Cygnus atratus) are native to Australia and represent a fascinating species within the Anatidae family. Below are several interesting facts about them
  • Unlike most swans, which are white, black swans possess predominantly black feathers with white flight feathers visible only during flight. Their bright red bills feature a pale tip, and they have the longest neck relative to body size among swan species, aiding in foraging in deep water.
  • They are indigenous to Australia, particularly abundant in the southeast and southwest regions, including wetlands and lakes. Following European colonization, they were introduced to New Zealand, Europe, and North America as ornamental birds in parks and estates, where feral populations have established in some areas.
  • Black swans form lifelong monogamous pairs, often remaining together year-round. Both parents share incubation duties and chick-rearing, with cygnets riding on their parents’ backs for protection— a behavior that enhances survival in open water environments.
  • They produce a variety of trumpet-like calls, including bugling sounds for territorial defense or mating. These vocalizations are more musical than those of mute swans and play a key role in social interactions within flocks.
  • Primarily herbivorous, black swans feed on aquatic vegetation, algae, and submerged plants by upending in shallow waters (similar to dabbling ducks). They can tolerate brackish and saline environments, allowing them to inhabit a broader range of wetlands than many freshwater-dependent waterfowl.

Symbolism in Metaphor and Philosophy

The term black swan” entered popular usage through Nassim Nicholas Taleb‘s book “The Black Swan” (2007), metaphorically describing rare, unpredictable events with profound impacts. Historically, Europeans assumed all swans were white until black swans were discovered in Australia in 1697 by Dutch explorer Willem de Vlamingh, challenging prevailing assumptions.


📸 The photo was taken with Canon R5 Mark II & Canon RF100-500mm F4.5-7.1 L IS USM.


Related Posts


Love my work? Support my journey by buying me a coffee or sharing it on your preferred social network. And don’t forget to swing by my online shop to check out my latest prints and gifts. Thank you 🙏 !

Follow me on Instagram | Facebook | Threads | LinkedIn | Tumblr | X | Buy Me A Coffee 


My 2022 Favorite Photos

  1. My 2022 Favorite Photos
  2. Favorite Photos: January 2023
  3. Favorite Photos: February 2023
  4. Favorite Photos: March 2023
  5. Favorite Photos: April 2023
  6. Favorite Photos: May 2023
  7. Favorite Photos: June 2023
  8. Favorite Photos: July 2023
  9. Favorite Photos: August 2023
  10. Paris Is Always A Good Idea
  11. Favorite Photos: October 2023
  12. Favorite Photos: November 2023
  13. Favorite Photos: December 2023
  14. My 2023 Favorite Photos
  15. Favorite Photos: January 2024
  16. Favorite Photos: February 2024
  17. Favorite Photos: March 2024
  18. Favorite Photos: April 2024
  19. Favorite Photos: May 2024
  20. Favorite Photos: June 2024
  21. Favorite Photos: July 2024
  22. Favorite Photos: August 2024
  23. Favorite Photos: September 2024
  24. Favorite Photos: October 2024
  25. Favorite Photos: November 2024
  26. My 2024 Favorite Photos
  27. Favorite Photos: December 2024
  28. Favorite Photos: January 2025
  29. Favorite Photos: February 2025
  30. Favorite Photos: March 2025
  31. Favorite Photos: April 2025
  32. Favorite Photos: May 2025
  33. Favorite Photos: June 2025
  34. Favorite Photos: July 2025
  35. Favorite Photos: August 2025
  36. Favorite Photos: September 2025
  37. Favorite Photos: October 2025
  38. Favorite Photos: November 2025
  39. My 2025 Favorite Photos
  40. Favorite Photos: December 2025
  41. Favorite Photos: January 2026
  42. Favorite Photos: February 2026
  43. Favorite Photos: March 2026
  44. Favorite Photos: April 2026
  45. Favorite Photos: May 2026
  46. Favorite Photos: June 2026
Close up of a couple of mating emerald damselflies (Lestes sponsa)
Emerald Damselfly (Lestes sponsa)

As 2022 draws to an end, it’s only natural to review the past year. Let’s have a look then, shall we?

This couple of emerald damselflies is one of my absolute favorite photos because it was so challenging. They kept flying around, not settling anywhere, and I had almost given up hope when they landed on that flower. However, I kept my eyes on it as its stem and the tip of the flowers were purple; I knew they’d loan a pleasing color to the scene and match the background nicely.

Close up of a pink African Daisy (Osteospermum)
African Daisy (Osteospermum)

An African daisy shot with my new macro lens. As much as I cherished my old one, I love this lens!

Close up of a mute swan cygnet (Cygnus olor) cleaning its feathers
Mute swan cygnet (Cygnus olor)

2022 hasn’t been a good swan year, at least not for me. Almost every time I set out to photograph swans, I couldn’t find any. I photographed this mute swan cygnet almost by accident. I was out in the woods, looking for squirrels, and passing by the beach when I saw the swan family swimming lazily around and cleaning their feathers.

Cherry tree flowers at Kungsträdgården, Stockholm

I just love photographing cherry tree blossoms in the spring. It doesn’t feel like spring if I don’t! Not a masterpiece by any means, but I love the light and the spring feeling it evokes every time I look at it.

Obviously, I love pink.

Red squirrel (Sciurus vulgaris) standing in the snow
Red squirrel (Sciurus vulgaris)

I also love squirrels. So much that it’s a wonder that this post only contains ONE squirrel photo.

Partying hard, another red squirrel (Sciurus vulgaris)

Wait, what! Only one squirrel photo? No, no, no! This has to be remediated immediately! Here you go! Cheers and Happy New Year!

Great spotted woodpecker (Dendrocopos major) wearing a golden party hat and holding a champagne glass.
Great spotted woodpecker (Dendrocopos major)

OK, this won’t win any wildlife photography contest, but I love it! I had so much fun processing this! I spent a ridiculous amount of time trying to fit the champagne glass between the claws perfectly.

This said, I wish you a very, very Happy New Year! Gott Nytt År as we say in Swedish.


Swan Lake

Close up of a mute swan cygnet (Cygnus olor) cleaning its feathers. 
A mute swan cygnet (Cygnus olor) cleaning its feathers. You can purchase this image in my online shop.

You’d think that photographing swans (or any other waterfowl) would be easy when you live on an island with plenty of birds around. And it is, most of the time. Not when you set out to photograph them, though. 
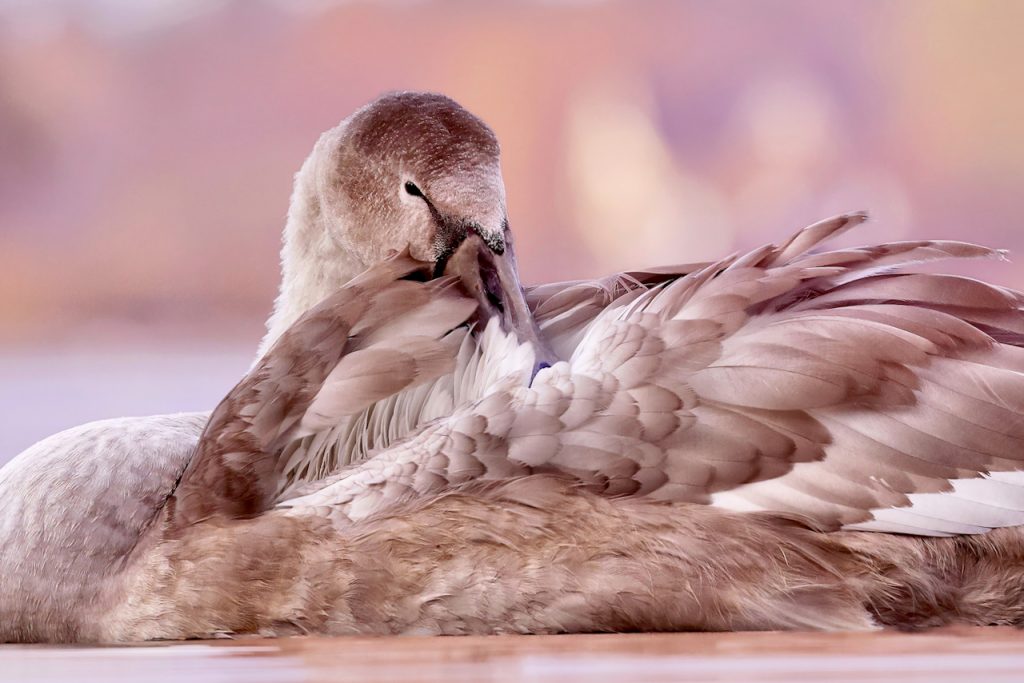
Close up of a mute swan cygnet (Cygnus olor) cleaning its feathers. 

During my usual walks along the coast, I could see many swans paddling quietly around the island, foraging, or cleaning their feathers, always close to the shore. So I’d think, “I’ll come back and take some photos.” Then I’d come back with my camera, and one of these two things would happen:

1) They wouldn’t be there. At all. Gone. Hasta la vista, baby!

2) They would be far away at sea, out of the reach of my telelens.
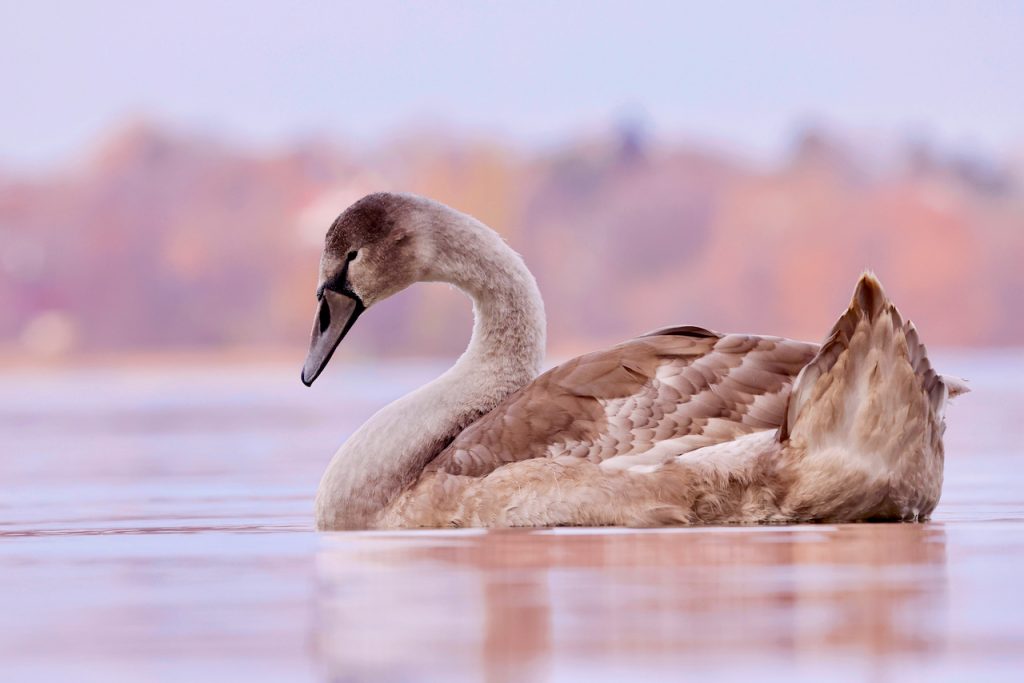
 

Mute swan cygnet (Cygnus olor)

But time, patience, and perseverance paid off, so I could take the photos—eventually 😉. These are some of the photos I was able to take after several frustrating attempts.

Have you tried taking photos of birds or animals? 


If you liked this post, share it on your preferred social network or forward it to a friend.